
By Niklas Nordin
The shoes that we will work with is pair of Yanko quarter brogue.
The best advice I can give is to be patient. Take it slow.
The second best advice is to remember that ‘your brush is always too wet’, always use less dye than you were planning.
In this tutorial I will be using 3 base colors and to create the gradient I will also mix these as I go along, in pre-decided proportions. Before you start it is important that you only use these ‘fixed’ colors that you decided on from the start as it otherwise can be difficult to get a similar color tone on both shoes.
All our products for patina can be found here.
Step 0: Preparations
Before you start to paint it is of course important that your colors are ready. Even if you are using only ready made colors, it is likely that you need to figure out the in-between blends, which sometimes can be a very non-linear function. It is, in fact, very unlikely that the 50/50 mix between two colors is the visually ‘middle’ color of them.
The 3 ‘base' colors I will be using for this exercise are Light Tan, Brown and Samurai Brown.
Where Light Tan and Samurai Brown are my own blends.
The colours are shown here:
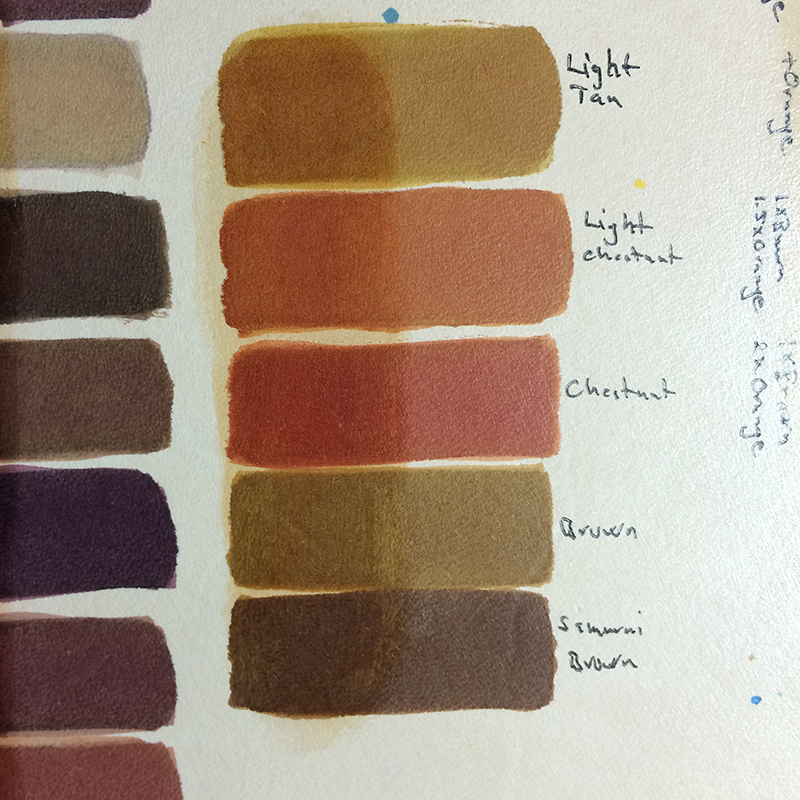
(Left and right side of the strip is with and without cream applied)
Light Tan:
10 x Yellow
1 x Red
3 x Dark Brown
Brown is just 'Saphir Brown 04'.
Samurai Brown:
20 x Dark Brown
1.5 x Red
The additional blends are mixed when I create the gradient and the proportions are as below.
When I go from Light Tan to Brown I use these in-between blends
1 x Brown
4 x Light Tan
1 x Brown
1 x Light Tan
And when I go from Brown to Samurai Brown I just use this in-between blend
1 x Brown
1 x Samurai Brown
I’ve found that this has become my standard way of working, One color for the high tone, one for the mid and one for the low tone and then 1-2 blends between each. The lightest color will always serve as the base color and is always the one you start with.
The general rule is to always start with the lightest colors and move towards the darker.
This leaves me with 6 different colors (in principle) and normally I use 5-7 colors.
Step 1: Cleaning
Time: 1h work + 1-2 days to dry
Tools:
- Nail brush
- Leather Soap.
Before we start with the actual stripping I clean them thoroughly using a leather soap and nail brush.
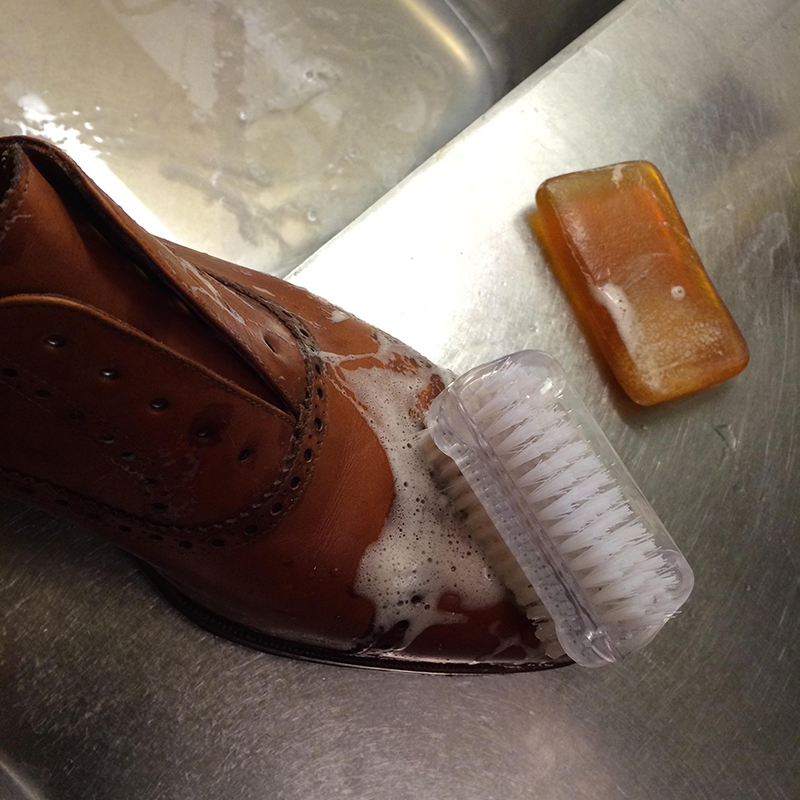
If you are uncertain about how much pressure to apply with the brush you can test it on your own hand first to find something you are comfortable with. The nail brush is designed to be gentle on the skin though, so using it on a shoe is not a problem.
Although the subsequent step - stripping, with Saphir Décapant, also will clean the shoe and remove the color it is a lot more aggressive to the leather than the soap and water and by using soap first it is likely that you don’t have to use as much Décapant as you would have otherwise and this will reduce the wear on the leather.
Also, if you have bought the shoes on eBay it’s a lot more pleasant to work with clean shoes, since it also removes unwanted odor. Keep using the brush until you can’t see any coloring in the foam.
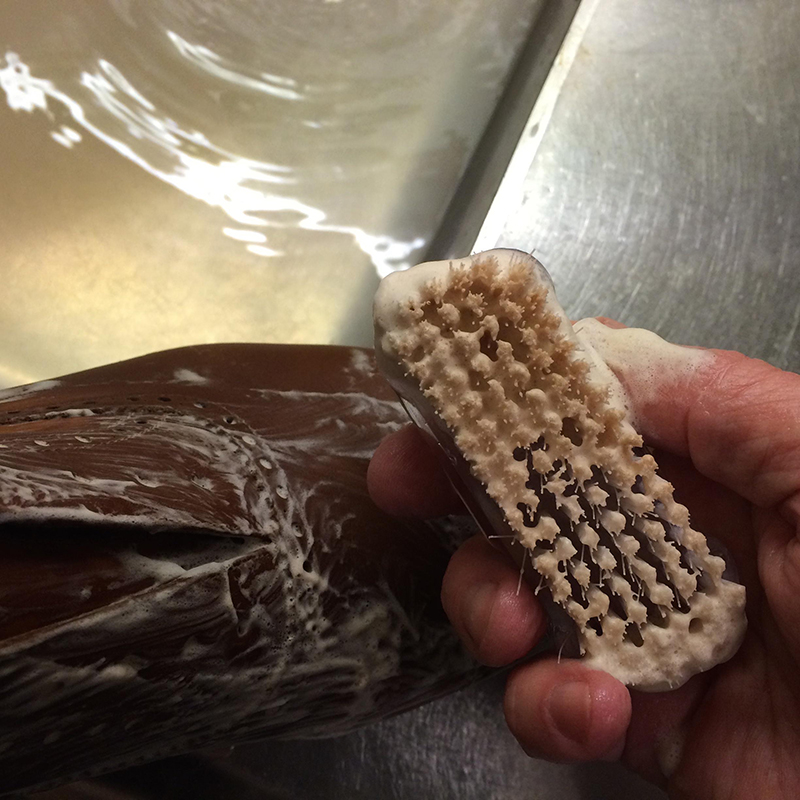
When I’m done I insert some torn pieces of newspaper to stretch the leather in order to reduce some of the creasing and give them a good shape. I then leave them to dry for 1-2 days.
Step 2: Stripping
Time: 1h / stripping + 1-2h to dry
Tools:
- Saphir Décapant
- Cotton
Here is how the shoes look once they have dried up after the cleaning step.
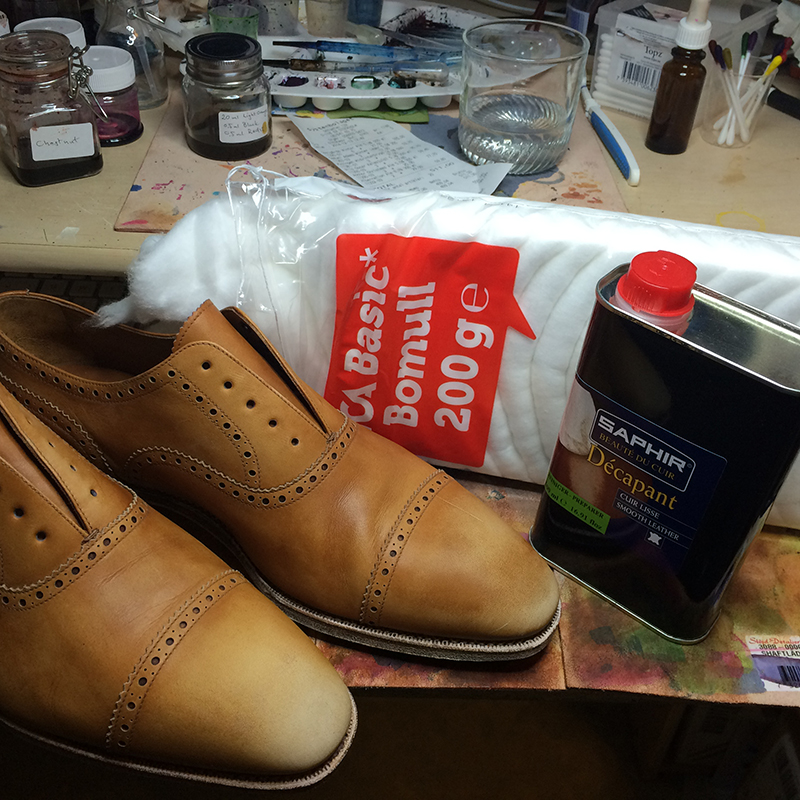
When you have finished stripping the shoes you should not have any areas that appear ‘glossy’, as the picture below.
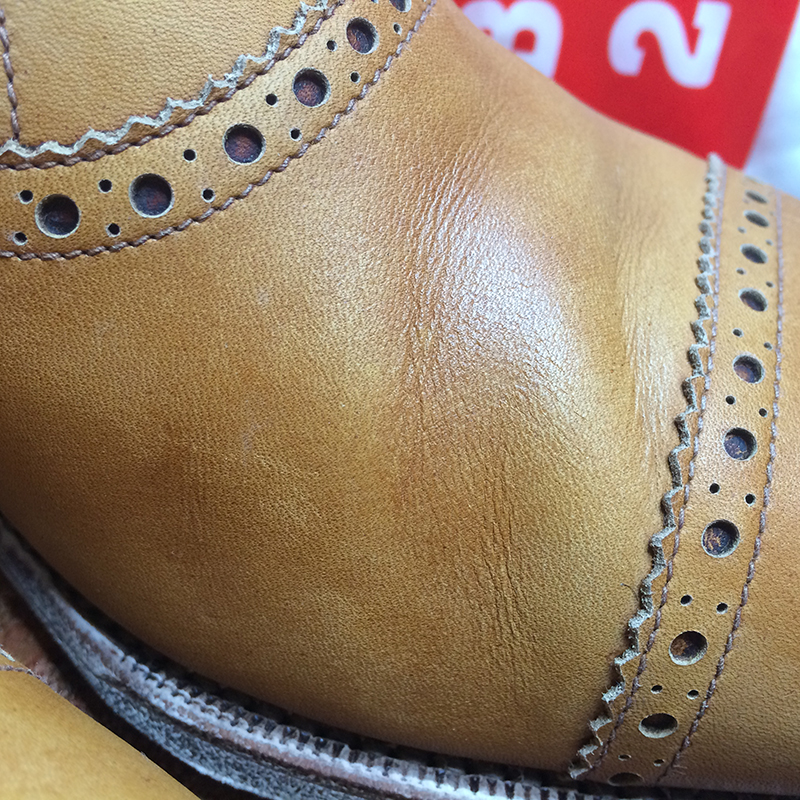
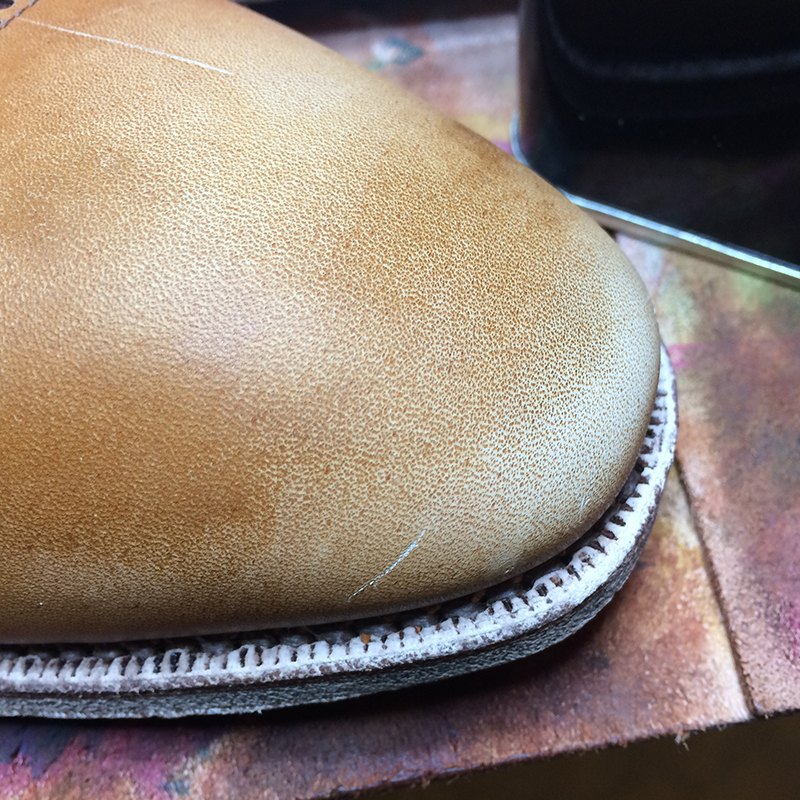
This ‘glossiness’ will prevent the dye to penetrate the leather and when you later apply cream and wax it will remove a lot of the applied color. Looking at the picture below we see that the tip of the toe is looking good already from the start, whereas the area to the left on the photo, the side of the toe cap is glossy and needs to be stripped.
I prefer to use cotton, but you can also use a cotton cloth (torn t-shirt or similar). I find that the advantage with the cotton ball is that you can tear it open when it becomes colored and use it as long as it is wet. After I have used it I put it in a cup that I leave outside until all liquid has evaporated, since I don’t want the fumes inside. If you can, avoid stripping your shoes inside, since the fumes will make you dizzy and nauseas. Although Im sitting indoors in the video below, since it was too dark and cold outside, I have the window open beside me.
In this example I am planning to make the toe dark and therefore I’m not too concerned about the difference in color between the left and right shoe. However, if you are planning to do an inverse patina where the toes and heels are lighter in color, you should take extra care to have the toes as similar in color tone as possible.
Step 3: Base Coloring
Time: 1h / layer and 1-2 h for drying
Tools:
- Synthetic brush or Metal Stem Foam pad (https://www.skolyx.se/en/home/158-saphir-teinture-francaise-laderfarg.html )
- Saphire Leather Dye Teinture Francais
- Paper towel or something similar to remove excess dye from brush with
- Masking tape
The first thing to do is to tape the backside of the lace holes.
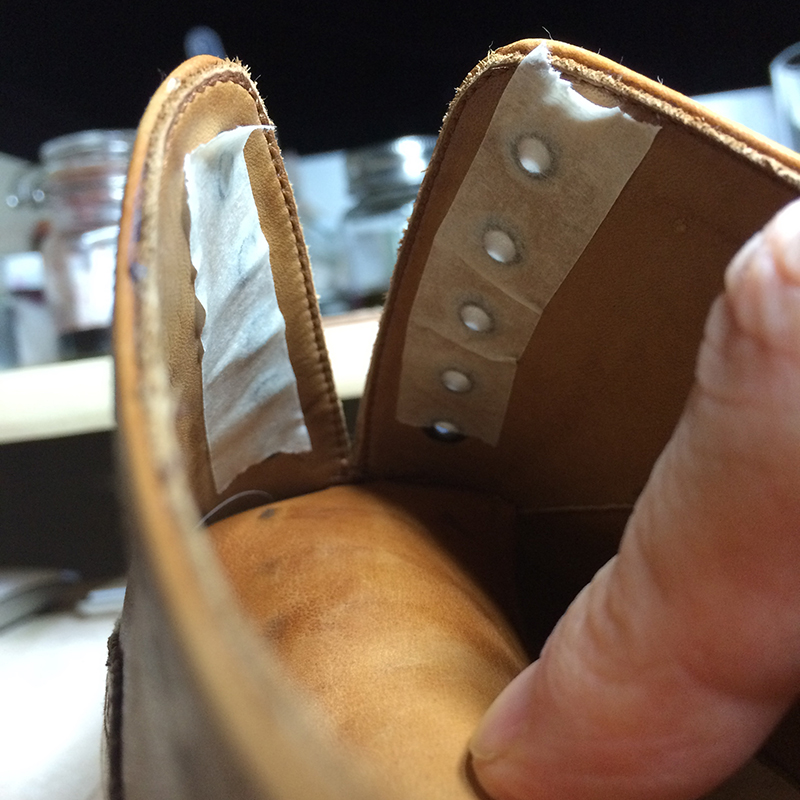
This will prevent the color going through the lace holes and ending up on the tounge. If you are planning to have a non-black sole edge you should also mask the welt and edge of the sole. Since black dye covers every other colour, the masking is not really necessary in that case.
If you bought the 50 ml Saphir Dye package the Metal Stem Foam pad should be included.
Otherwise, you have to get it separately if you want to use that instead of a brush.
The foam pad is only useful for the base coloring step though.
The first layer is applied in abundance. You really soak the shoe with the base color dye.
Don’t be afraid if you are using yellow and it looks black. That is perfectly normal. In fact, almost every color you will use will look almost black when you apply it and the leather gets wet.
The more layers you apply the more even the color will look, but 2-3 applications is normal and don’t worry if there is a lot of ‘striping’ after the first application.
Here they are after 2 layers of base color has been applied.
Step 4: Gradient Coloring
Time: anything from 1 day to 1 month, but expect at least 2-3 days, minimum.
Same tools as the previous step
This is the the main step really and where the whole shoe takes on its final form.
For this example I wanted a darker toe, a darker bottom and a darker lacing at the bottom.
The brush stroke always moves from darker to lighter. The first brush stroke is also very light and the more the brush have been used, the harder the pressure.
The only time I don’t follow the dark-to-light rule is when the brush is very dry and contains almost no dye pigments, like when you have used it for a long time. Never focus on a small spot for a longer period of time. It is very easy that it becomes ‘blobby’. If you want to make a certain area darker, work it for a short time and then wait a while or work around it, then go back and continue. Since you are applying small amounts of pigment at a time you want to take small steps and have the entire shoe develop more or less simultaneously.
In the videos below you can see how the shoe progresses. As the color gets darker, the lesser area you paint and/or the less you paint over the light areas.
It might be necessary to go back and correct some things, or do minor tone adjustments.
This is the first application after the base coloring.
This is just a collection of video-clips showing me doing the same thing over and over, but also showing how the shoe is getting darker and darker.
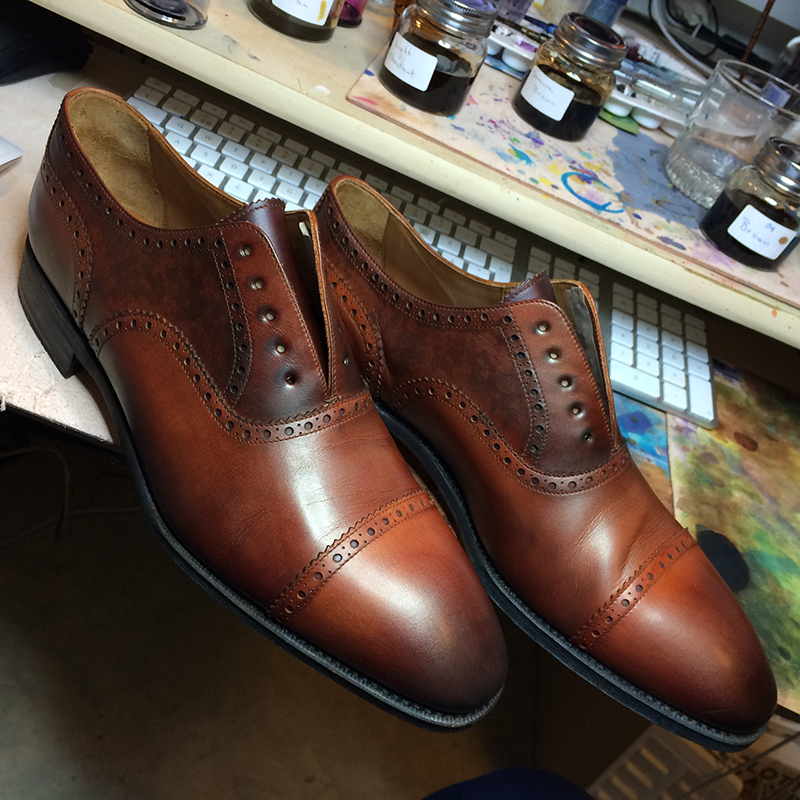
This is how they looked when I considered the painting done, before I started to apply the cream/wax.
Step 4b: Optional Sponge
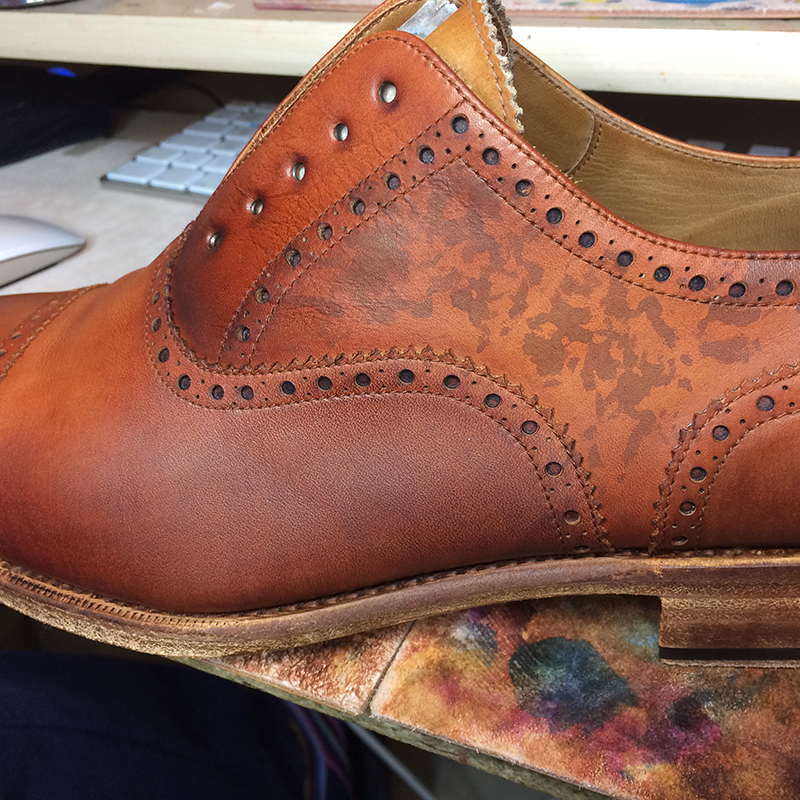
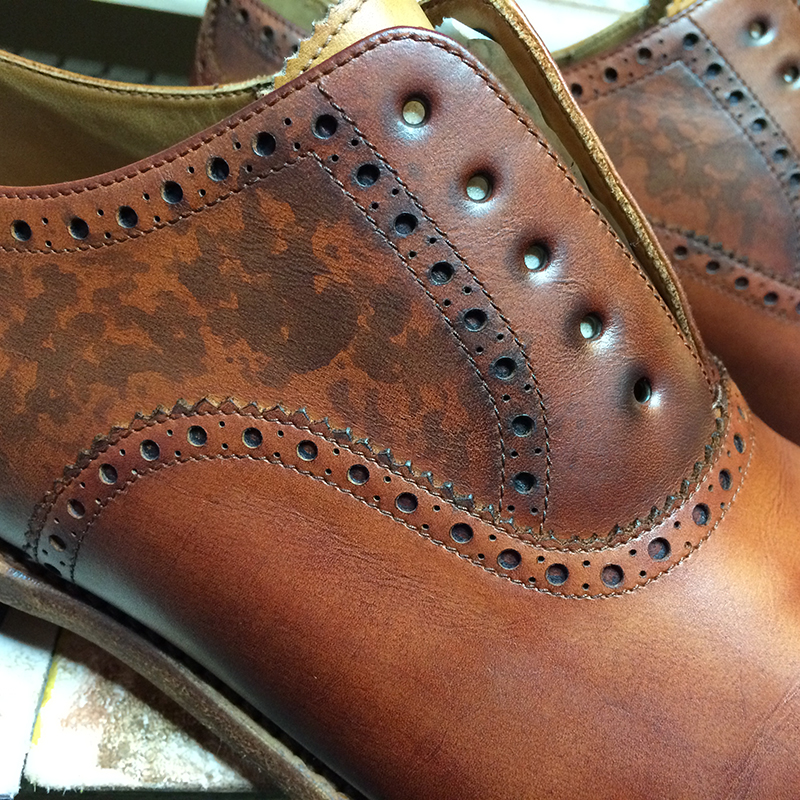
An optional step is to use a sponge to create a nice marble pattern. Here I am just applying it on the side of the shoe and in this example I will only use it to darken some of the base color and change the background tone for the final result. You can also use the sponge to apply all the colors and not paint over it with a brush like I do here.
In order to do this you simply start with the light color and then go for the darker ones. And remember that if you want to have the same color tones on both shoes it is a good idea to blend the two colors you want to use beforehand in certain proportions and I really recommend that you do a test run first on a piece of test leather.
In order to do this you simply start with the light color and then go for the darker ones. And remember that if you want to have the same color tones on both shoes it is a good idea to blend the two colors you want to use beforehand in certain proportions and I really recommend that you do a test run first on a piece of test leather.
This is how they looked after they had dried.
Step 5: Sole Edge and Sole
Tools:
- Synthetic brush
- Saphire Leather Dye Teinture Francais
There is a special dye for the soles and its edges, but I use the regular ones.
The edge and sole absorbs very large amounts of dye compared to the uppers, but together with Saphir cream and wax, especially the Saphir cream, which has a large amount of pigments, you can make the soles and edges in different colors than black. Although don’t expect them to respond to the dye color in the same way as the uppers.
Step 6: Sealing the Color
Time: 3x10 min + 2x20 min drying
Tools:
- Neutral Cream
- Brush Applicator
- Saphir Renovateur
- Brush (Hard horse hair)
By sealing we mean that we want the colors to penetrate the crust and really stick so it won’t lose or alter color if it becomes wet from rain, for example.
In some of the videos you might see me using my finger to rub the leather. That is a form of mild sealing. By rubbing it with my finger I’m making the leather warmer, thereby opening up the pores for better absorption, and forcing the color into the pores with the rubbing motion.
Before you apply the cream I recommend that you use a cotton cloth and rub (hard) the entire shoe down. This is to prevent unnecessary smearing as you probably will have some excess color residues that lie on the surface. I do 2 rounds of cream application and then 1 round of Saphir Renovateur after. For the first application I use very little cream on the brush and small circular motions. Again, to prevent unnecessary smearing. I always start in the lightest color areas and move outwards from there.
Once the first round of cream has been applied I leave it to dry for approximately 20 mins and then I brush it with the hard brush to remove the excess cream.
For the second round I am more generous with the cream, but do exactly the same. Start in the light areas and work outwards.
For the final step I apply lots of Renovateur. For this I just use my finger, but the process is the same as before. Its basically a Renovateur massage.
For sealing the soles and its edges I prefer to use a colored cream, but I don’t use any Renovateur for these parts.
The stripping process really dries the leather and you will notice that is very very thirsty.
So this last step is just to make sure that we reduce the ‘damage’ done.
It might seem backward to end with Renovateur and the reason I don’t start with it is that it has a tendency to smear the colors more than the cream, since the consistency is much more runny than the cream.
And remember to brush the shoe after each application. Especially the last brushing Im using a lot of pressure to make the shoe slightly warmer and absorb the colors better.
You might need to clean the brush afterwards as well, since it probably has become colored from the dye.
After the first application of cream on the left shoe.
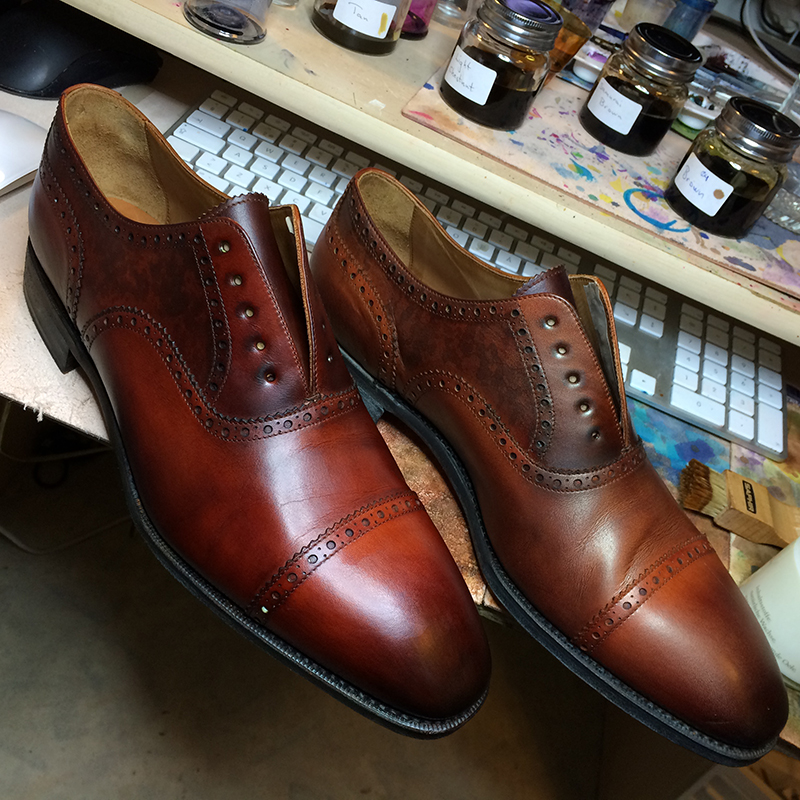
Notice how the shoe that has received the first application of cream has turned slightly more red.
This did not happen in the test and preparation phase and was not planned:
Step 7: Polish - Cream and Wax
Time: ?
Tools: ?
The shoe is now ‘done’ in the sense that you can apply cream/wax as you would normally do. This is covered in this guide.
Final result
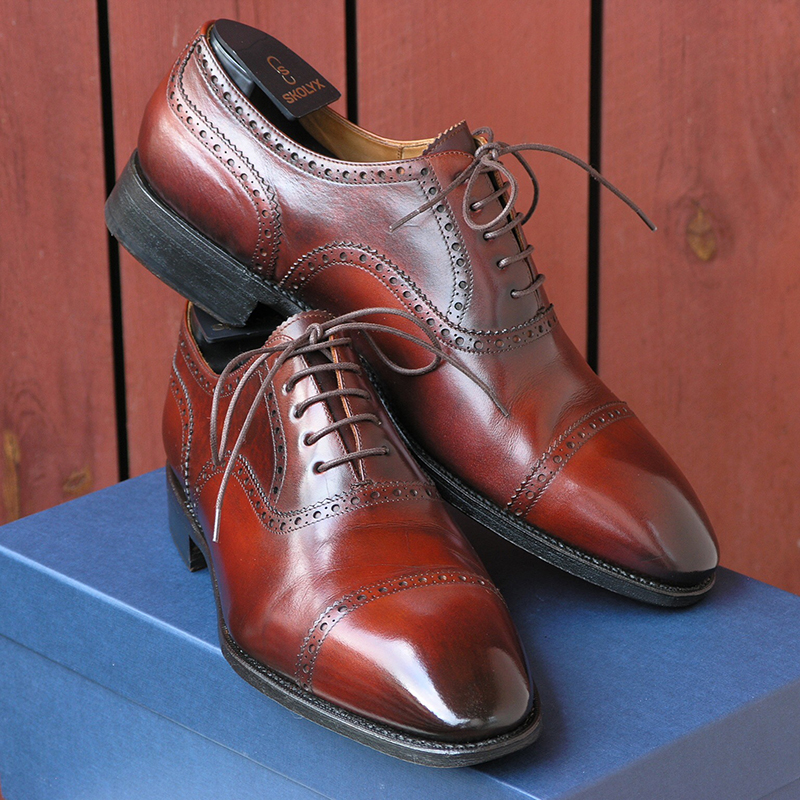
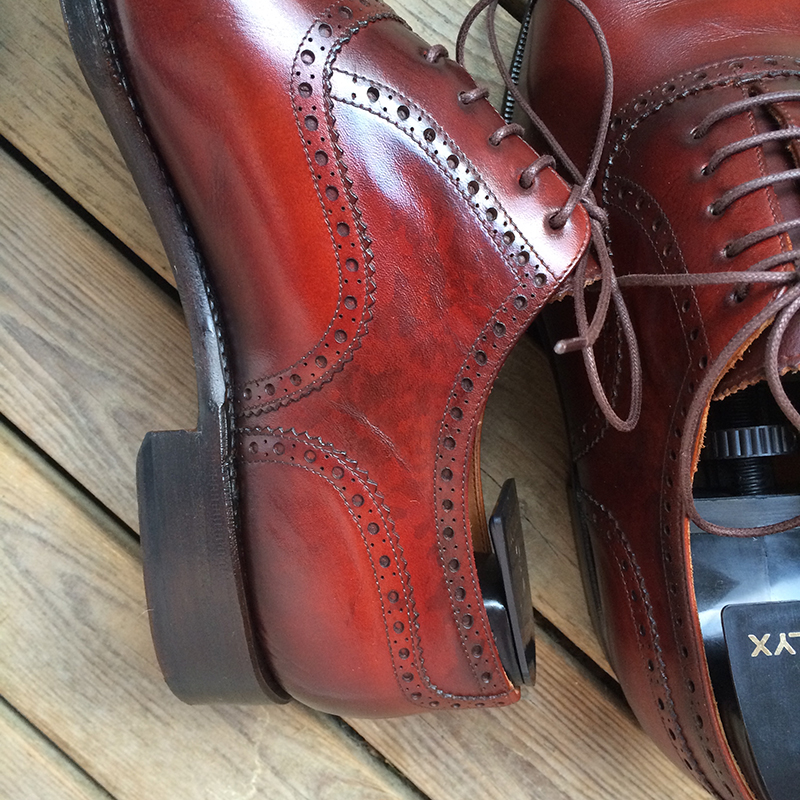
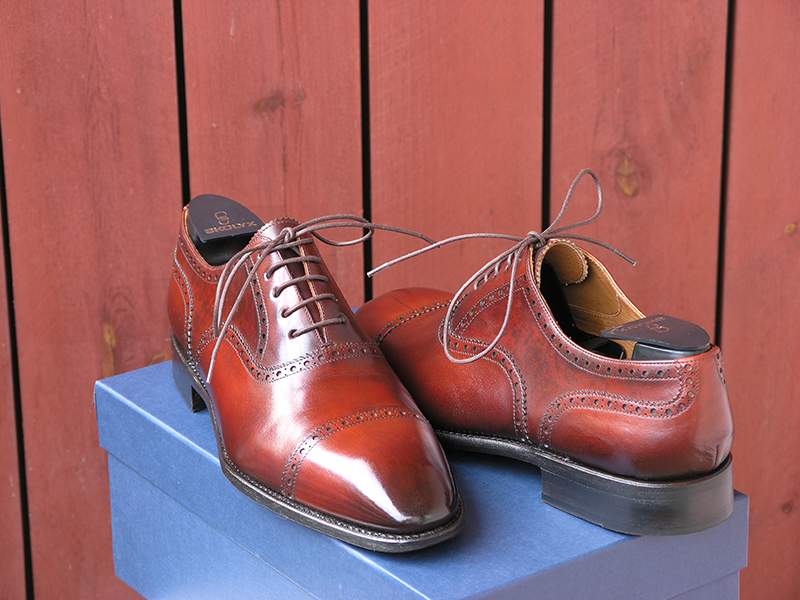
I did not plan the final color to be this red. Even though all preparations and testing on a piece of leather yielded another color, this is more or less ‘normal’. Every leather is an individual and behaves differently so expect that the final result might not be exactly what you wanted.
So learn from your mistakes and one thing I learned here was that using small amounts of red in the base color is maybe not such a good idea, since the end color seems to be very sensitive to this.
All our products for patina can be found here.


